temporary laptop fix
by weekend
My laptop keyboard broke, making the laptop unusable if it was still plugged in. This wouldn’t be a problem but the keyboard is also required to turn it on. This post is about the dirty hacks I did to make my laptop usable without keeping it open all the time.
Problem

by weekend
Image license: Creative Commons Attribution Non-Commercial Share-Alike
The problem started with just a single stuck key, I woke up one day and the laptop would constantly press ‘=’. The laptop had been sitting turned on for about 10 hours before I touched it and noticed the problem. Naturally I thought there must have been some dirt in there so I set out to clean it. After removing some of the relevant keys and cleaning it the problem still wouldn’t go away.
If I pressed many keys at once the drivers (or the hardware scanning the keys, not sure) would get stuck and not register the repeated button, and since I had an external keyboard to use it was almost usable this way, but the problem got worse over the next 2 days.
In a last-ditch effort to make my laptop usable again, I removed the whole keyboard, removed all the individual keys and cleaned it as best I could (though having some ethanol to really get in there and clean even better would have been nice).
Cleaning was a failure, the keyboard would continue to have buttons pressed and it was so bad that it got stuck in a bootloop. It would turn on, then a few seconds later turn off again. I removed the keyboard completely to prevent further issues, but there was one problem: the power button is on the keyboard.
Temporary fix
by weekend
Image license: Creative Commons Attribution Non-Commercial Share-Alike
As a temporary fix (and avoid having to only use my other tiny laptop/tablet) I would touch the keyboards connector to the motherboard to power it on and then removed the keyboard again once it started to boot.
A replacement part will cost 100 euro and to order it in my layout it needs to be specially requested from ASUS. Additionally I should also replace the cable to the laptops internal screen for an additional 35 euro (and the usb 3 ports are broken too.. but that’d mean a motherboard replacement and cost far more than its worth).
I have to wonder if it’s worth paying for that.
I like having the same keyboard layout across all devices, because constantly switching is really annoying and this could be an opportunity to switch to qwerty for all my devices. But right now, I don’t want to spend money on this laptop, nor on changing the key layout of the mechanical keyboard. So for now I’ll be using my laptop as a desktop.
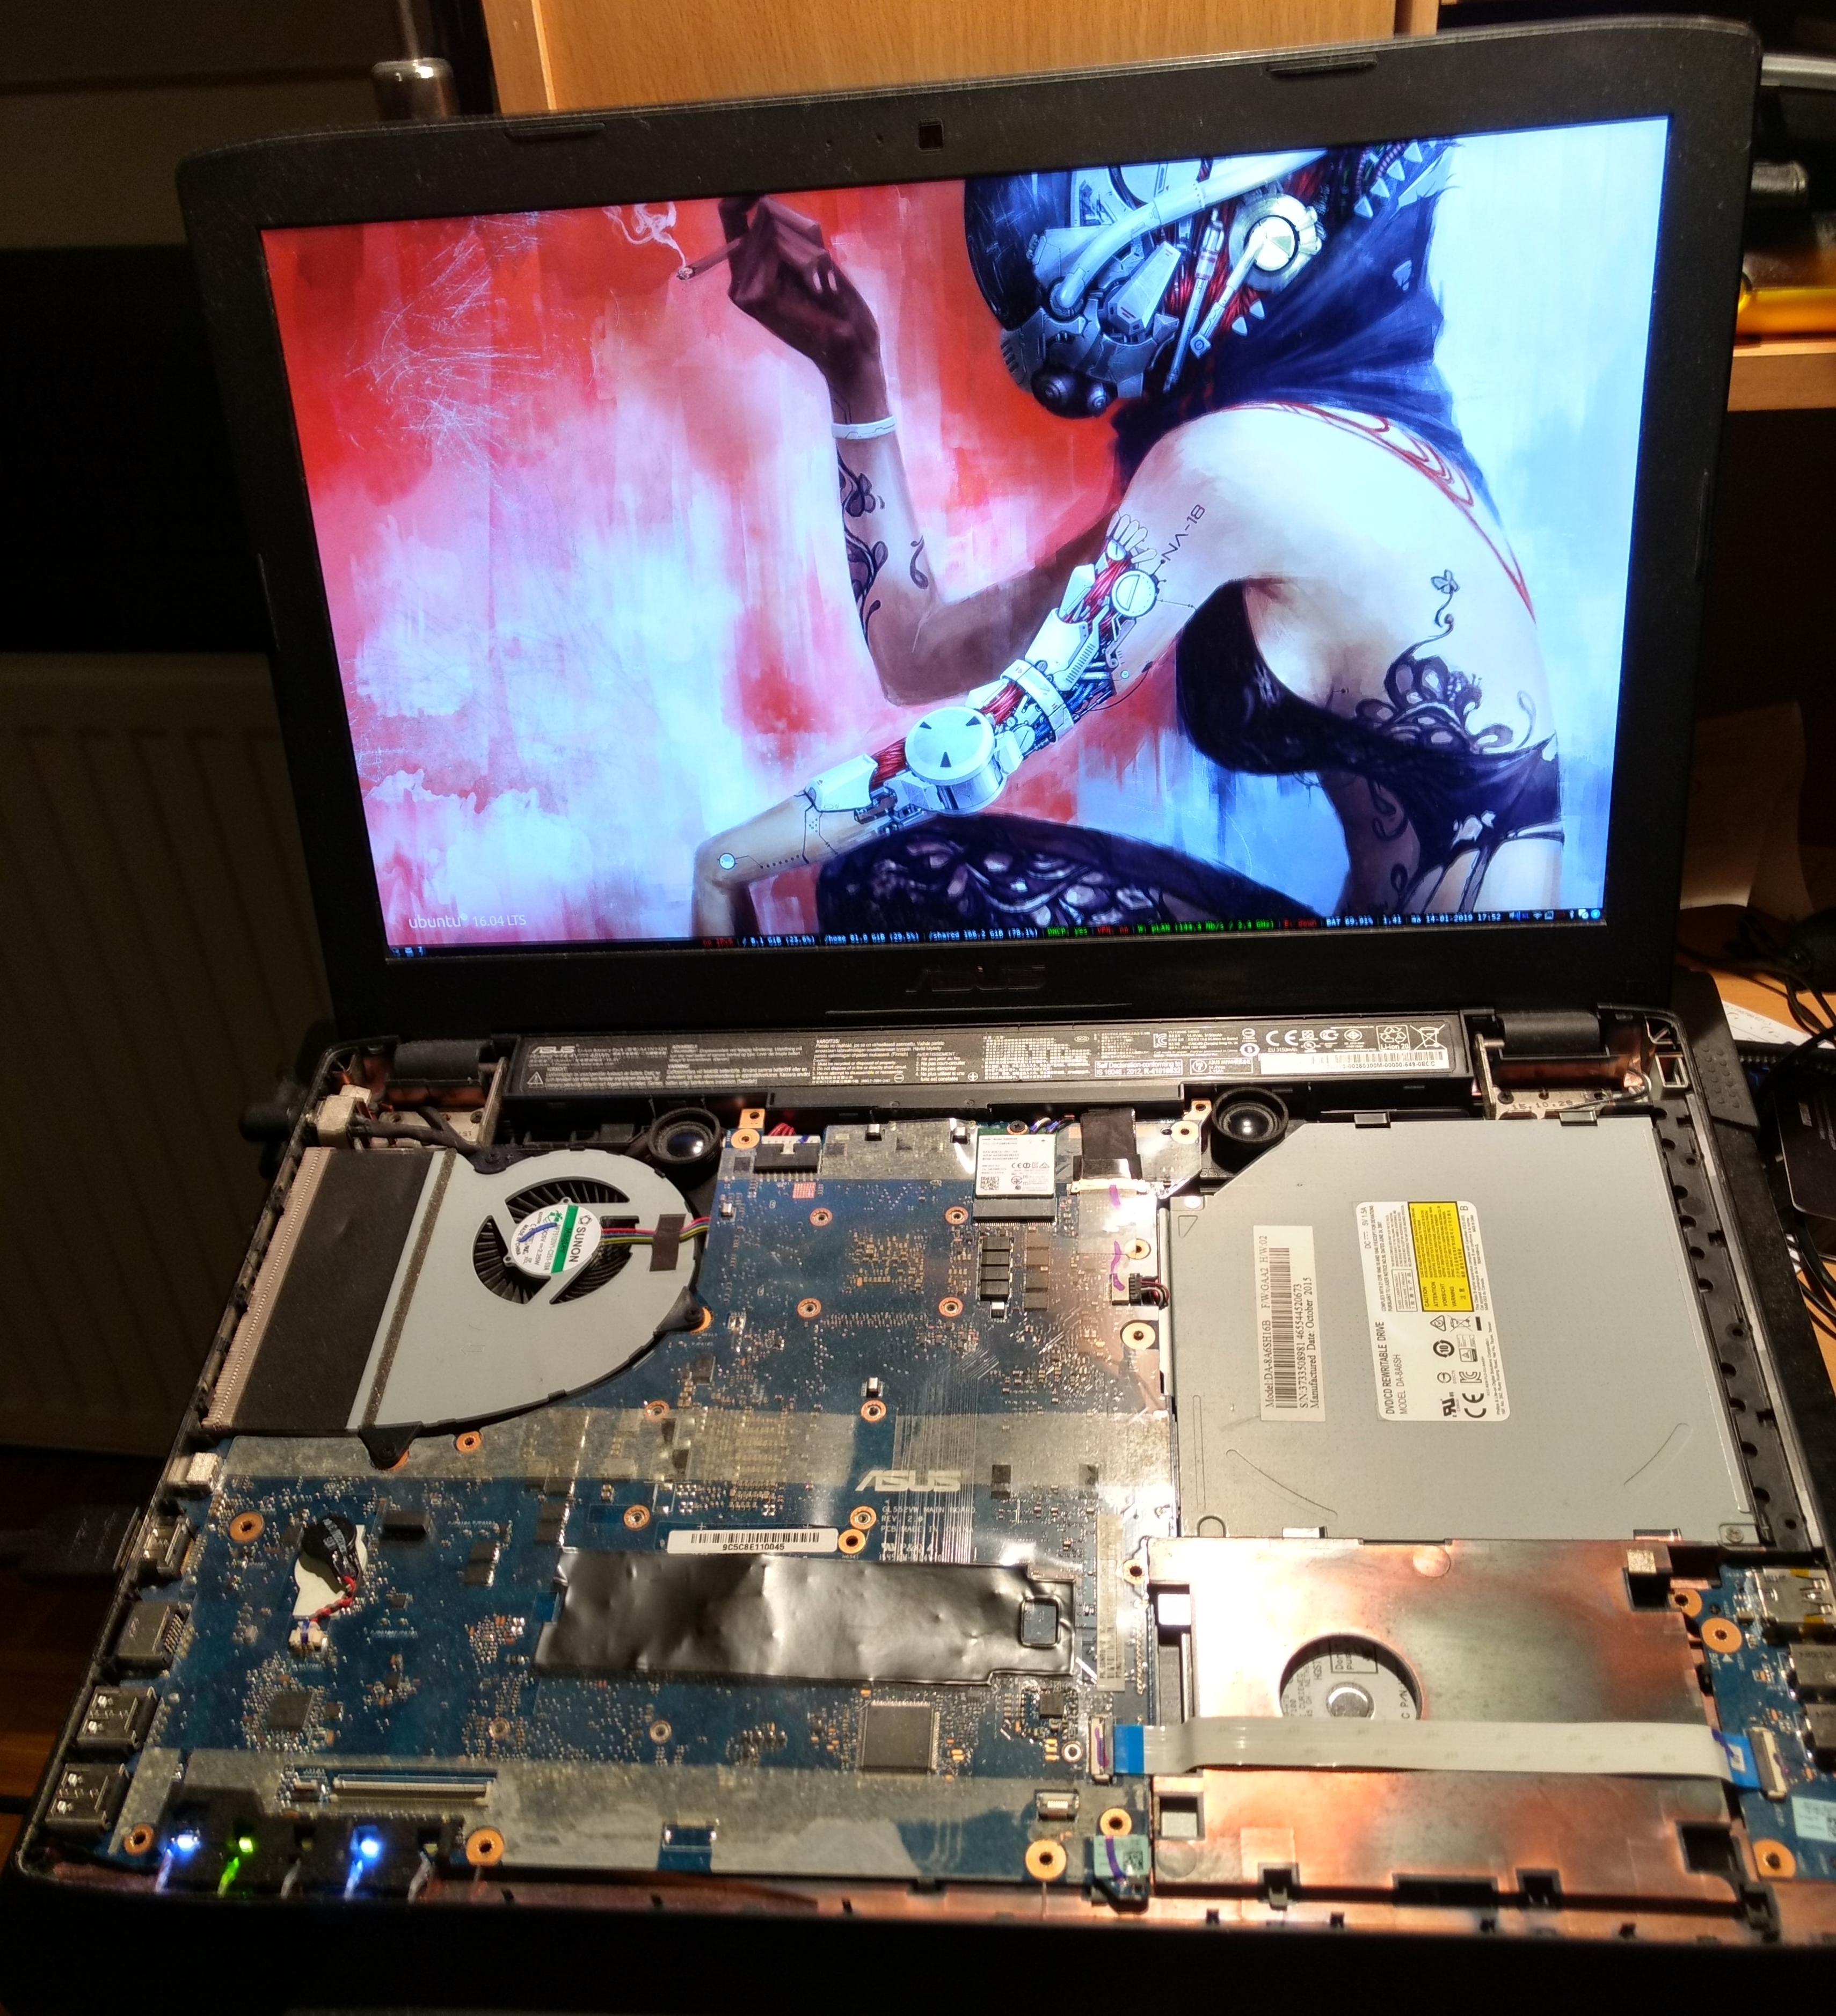
Slightly less temporary fix
by weekend
Keeping the laptop without its keyboard/top cover isn’t a nice solution though, I don’t like the increased risk of spilling or dropping something and breaking the motherboard. So as a temporary solution, I decided to plug in only the power button of the keyboard and keep everything else unattached.

by weekend
Image license: Creative Commons Attribution Non-Commercial Share-Alike
The keyboard is a single large part consisting of the top plate on the laptop, the thin flexible keyboard pcb + membrane switches in the middle and a metal bottom plate. There is no way to take this apart in a way that it would go back together. So finding out how the power button is attached would not be easy even if the keyboard wasn’t broken.
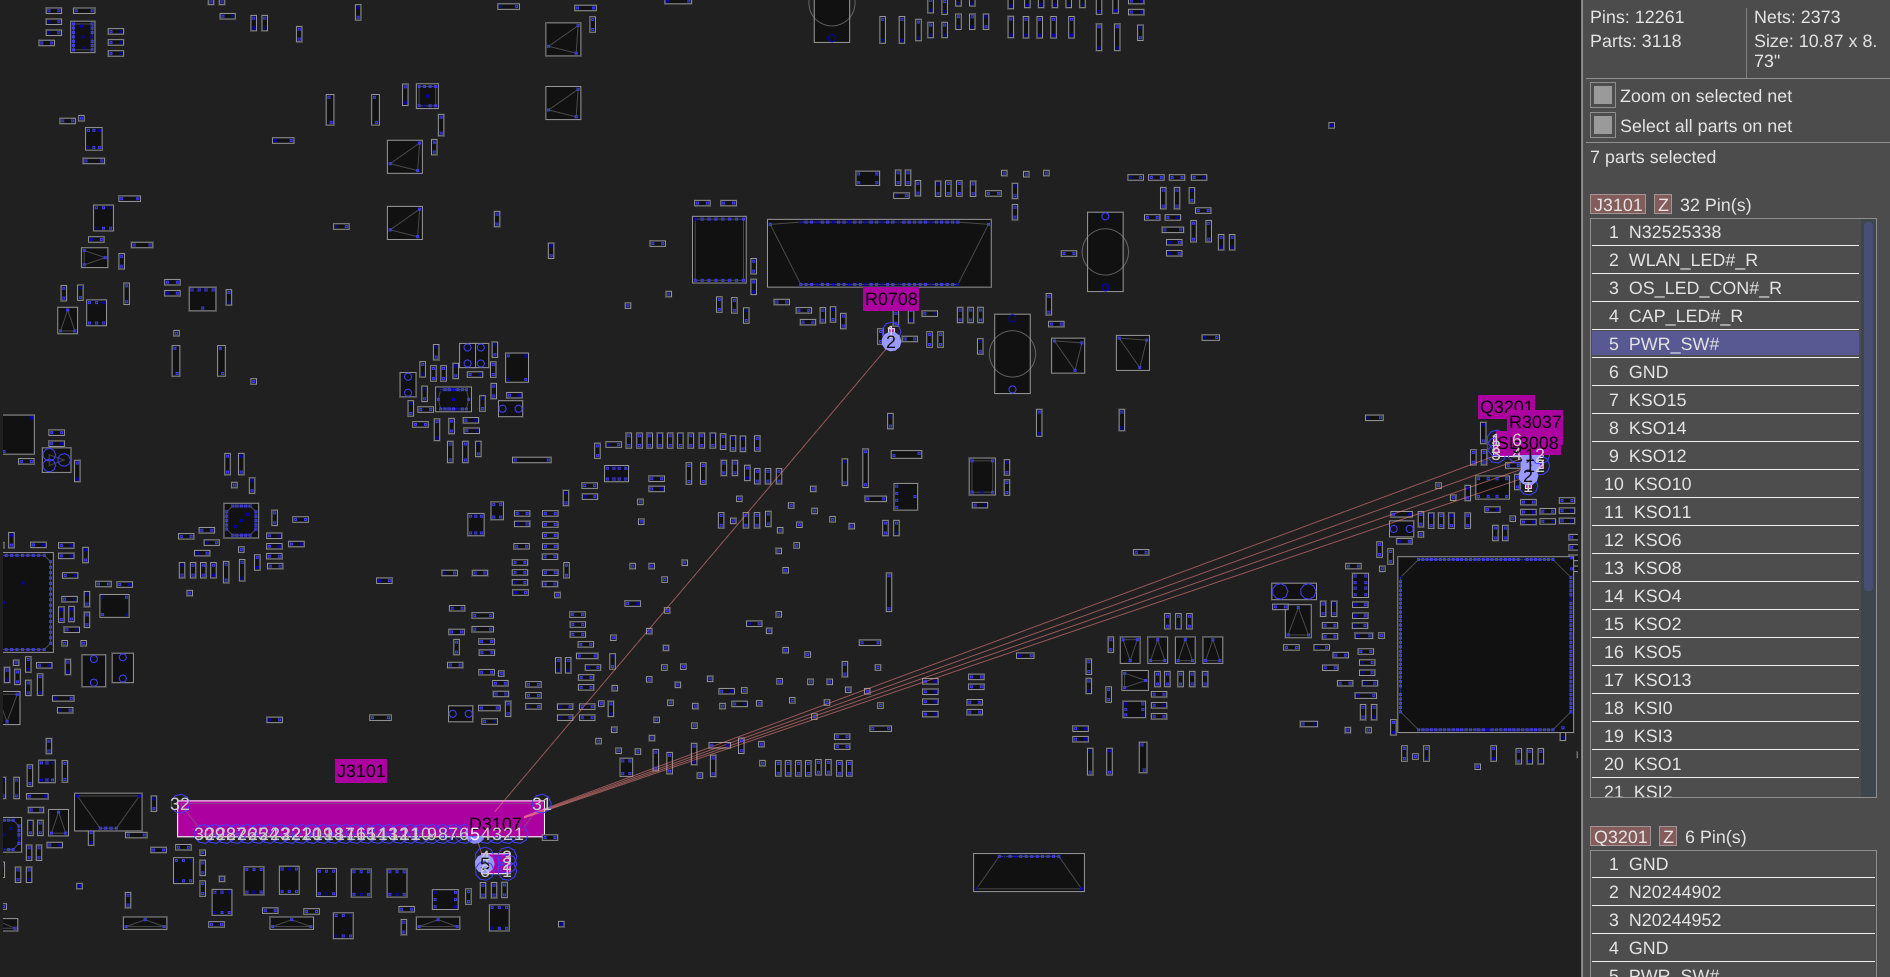
Luckily for under 5 euro you can buy the board view of my laptops motherboard. This isn’t as nice as a full schematic, but for this it might be even better.
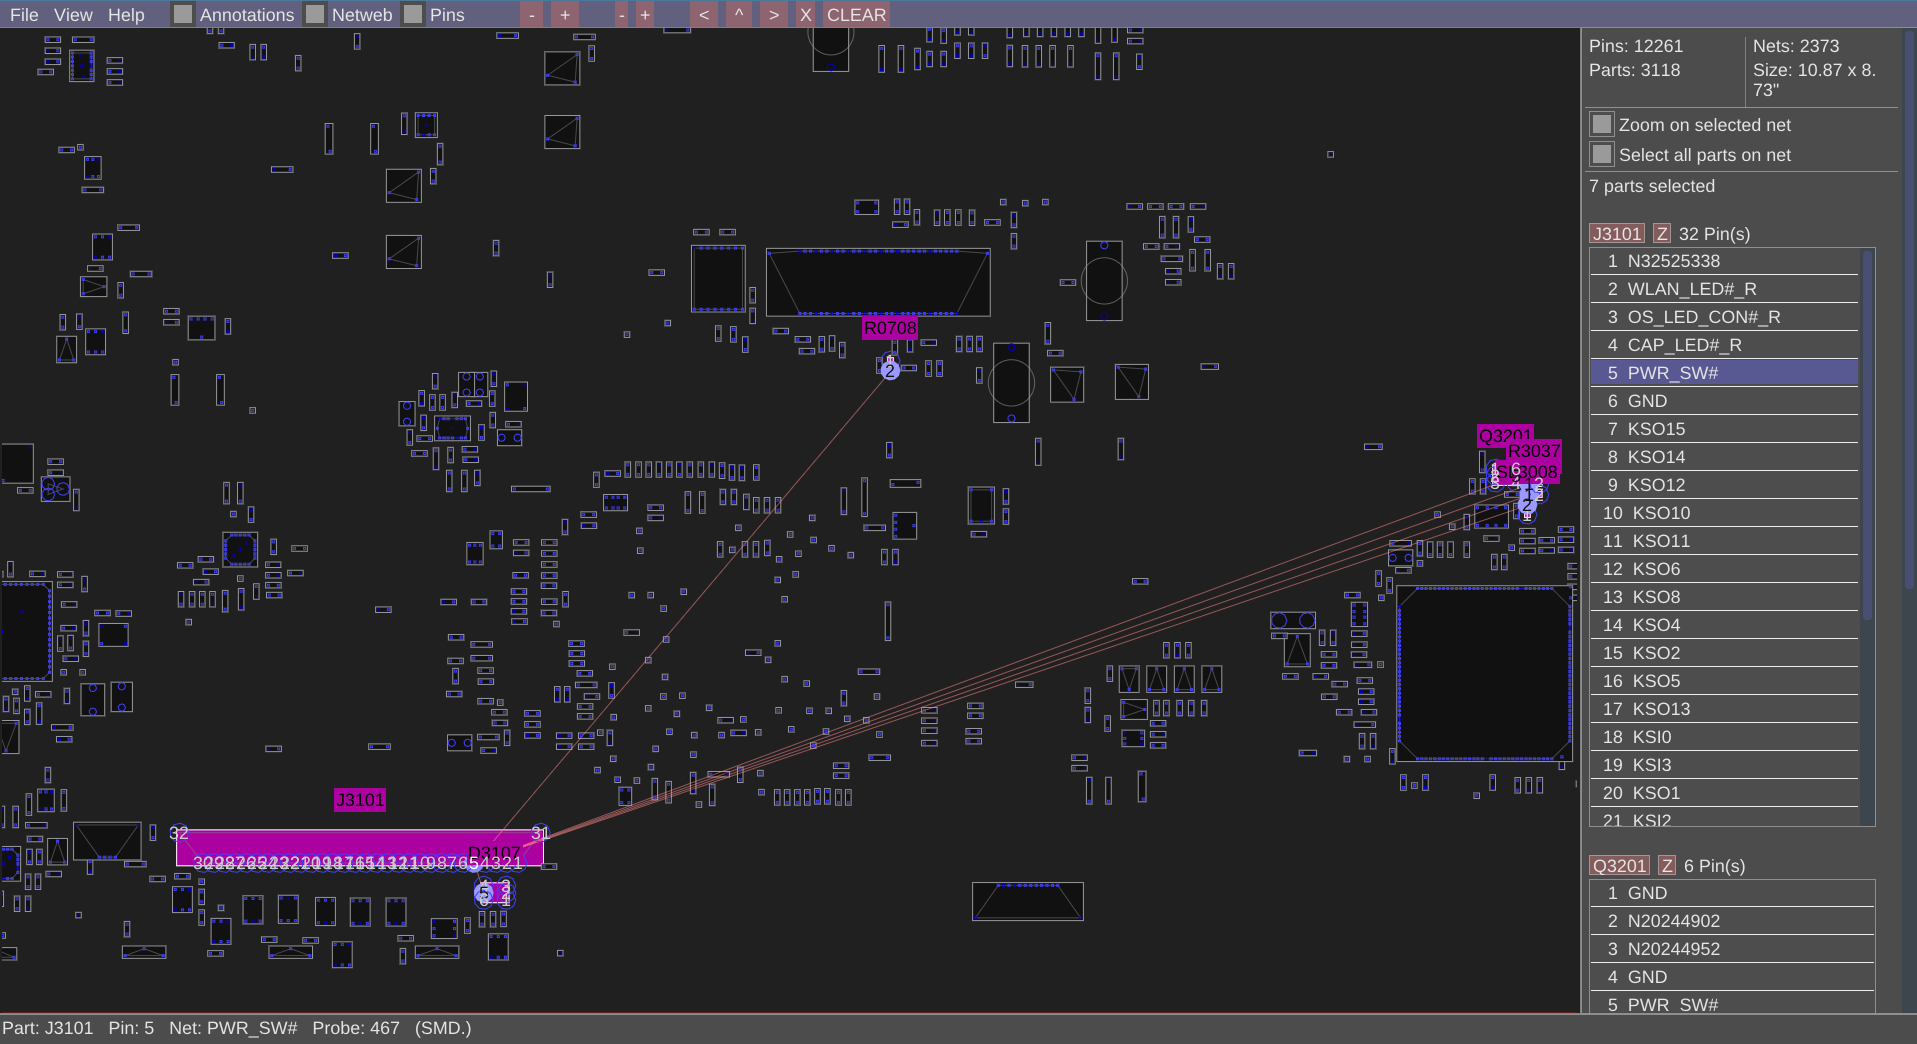
Opening the boardview with openboardview we can see all the components on the motherboard and when selecting specific pins we can see all the other pins attached to the same net. Conveniently the nets have logical human readable names, and it was super easy to see that the power switch was on pin 5 of the connector. As is typical for computers, to start it up you just to pull the power pin to ground (which is conveniently on the next pin).
by weekend
I measured the power button on the keyboard and it seemed to work fine, it was something else in the keyboard matrix that is causing problems, so I could reuse that button and avoid having to use an external switch.
To do that I simply cut the other pins on the connector. 2 of the pins connected to on the connector were not connected on the flatcable, leaving power(via a resistor), power status, power switch and ground on the first 4 traces on the connector (pins N32525338, OS_LED_CON, PWR_SW and GND on connector J3101). I cut away a piece and added some tape to avoid anything shorting out and reattached the keyboard.
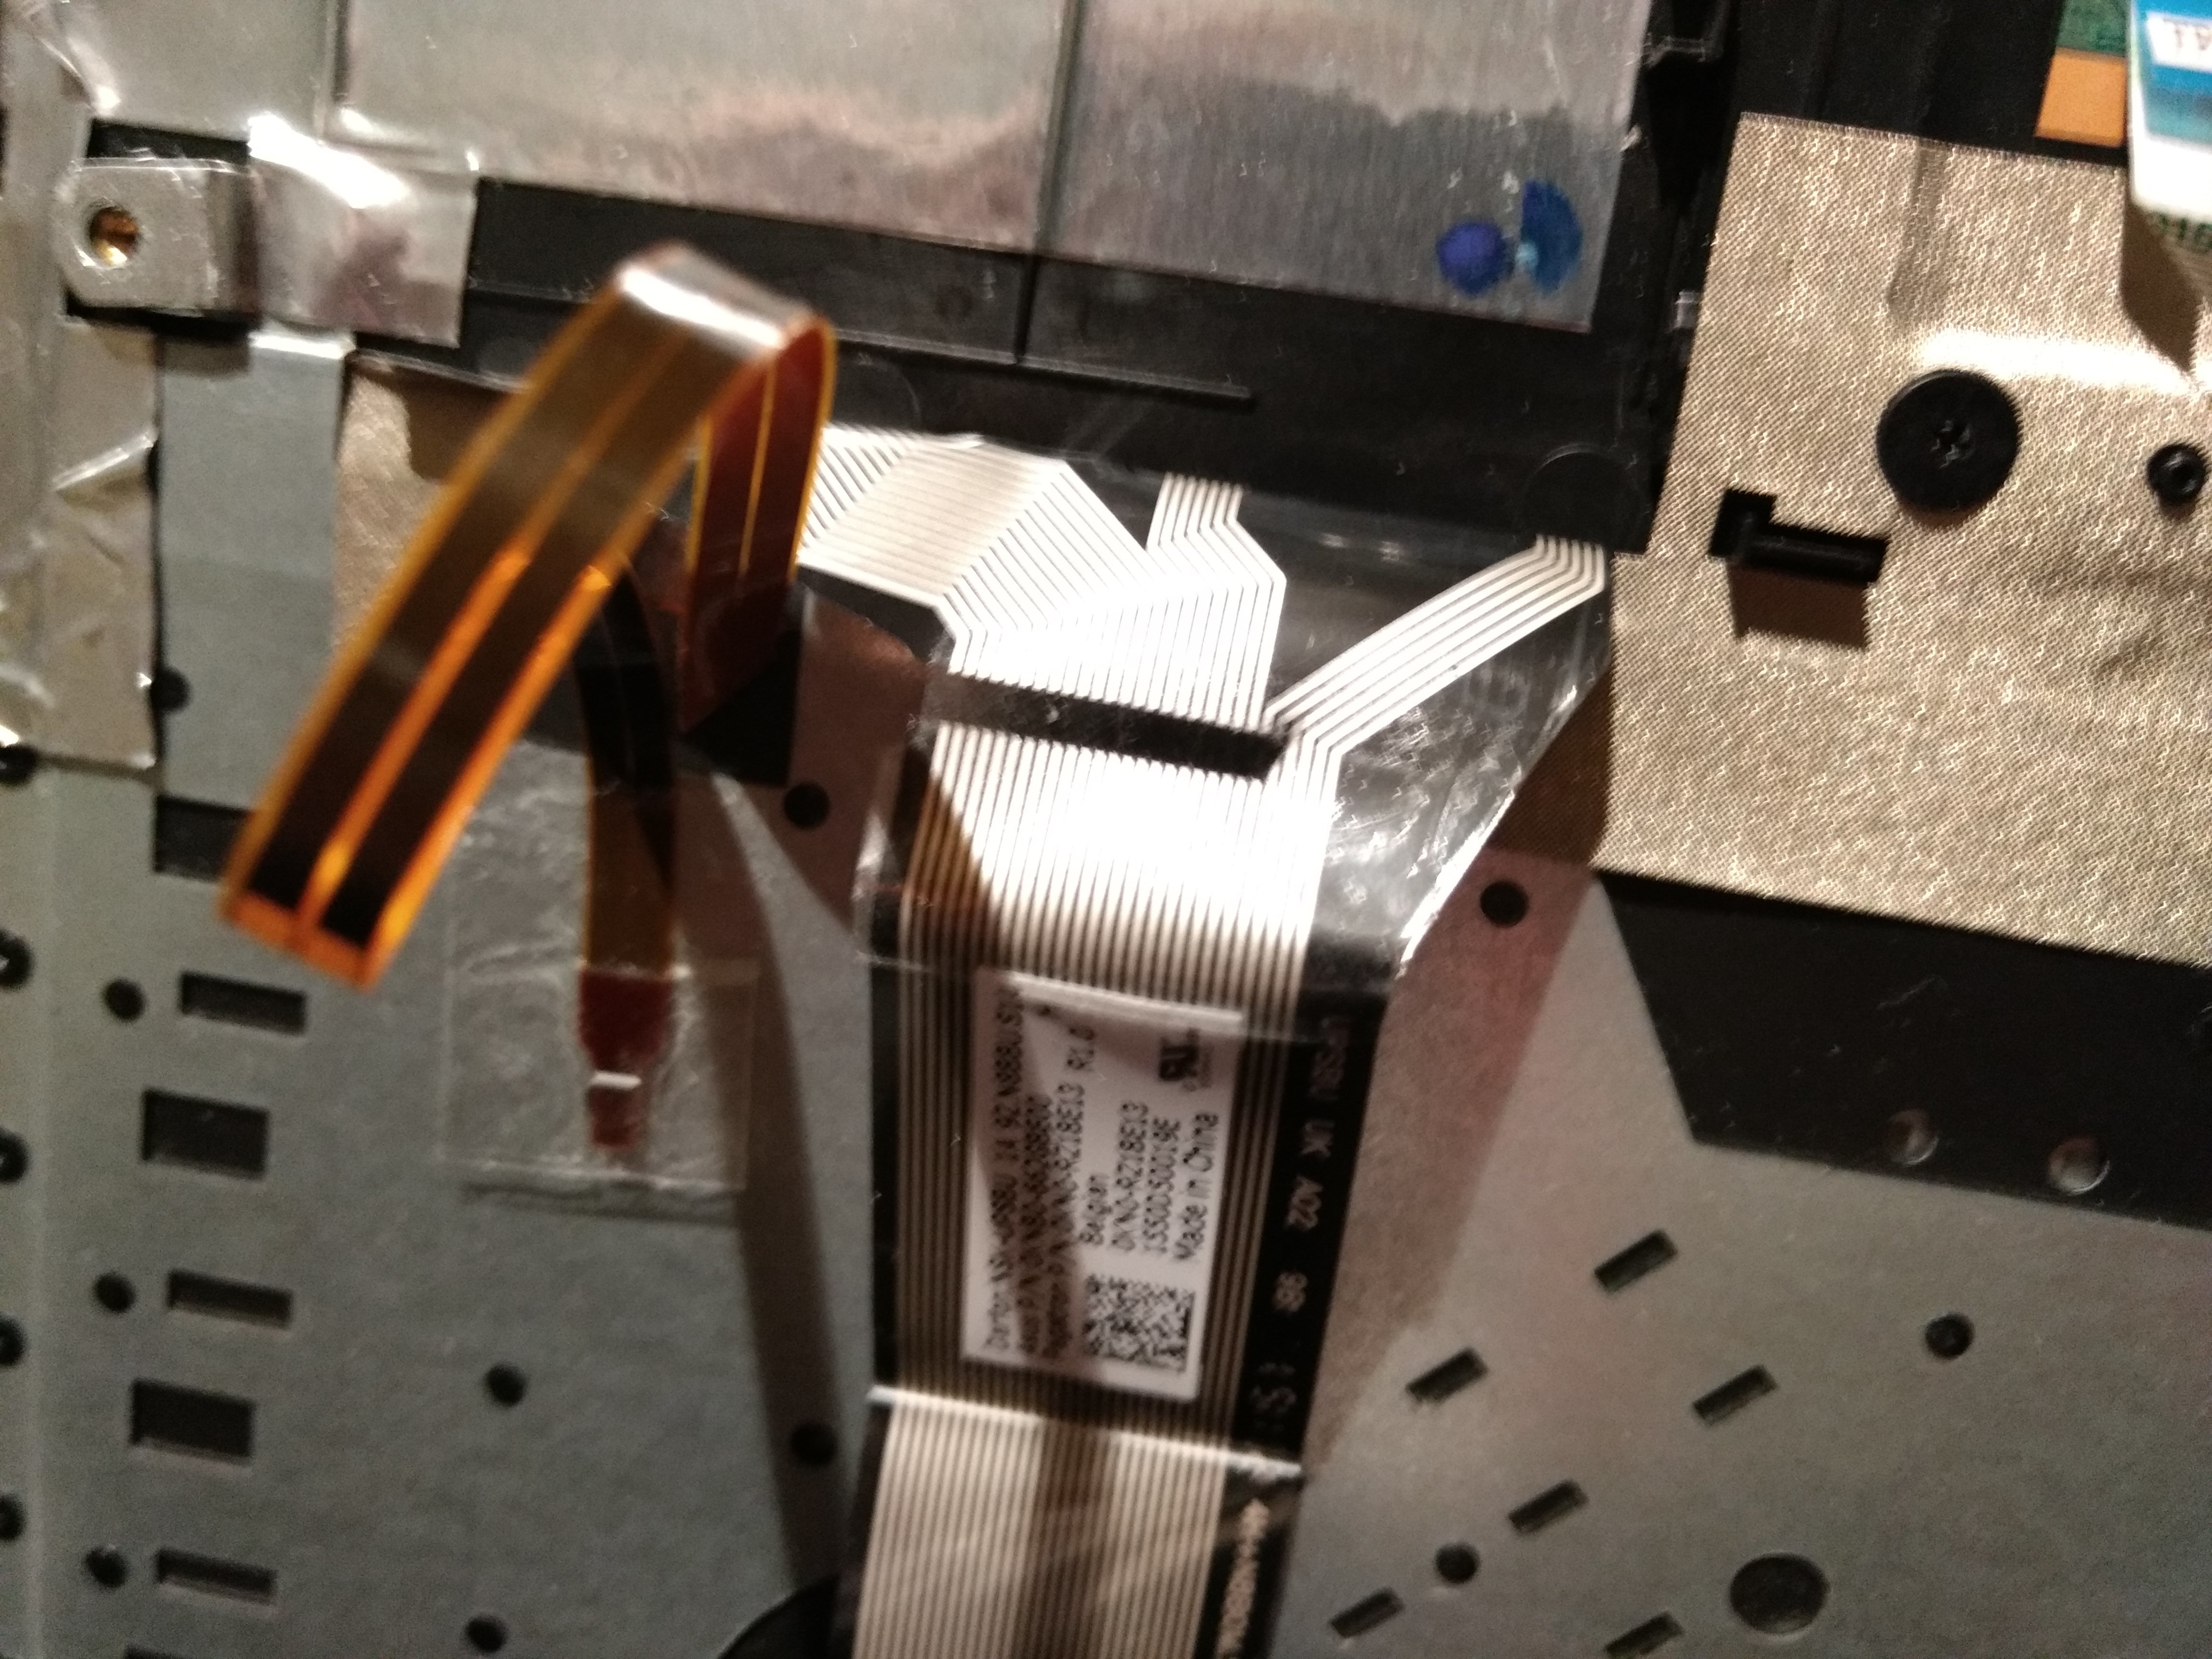
Image license: Creative Commons Attribution Non-Commercial Share-Alike
My fix isn’t perfect, I was a bit too rough and the last trace (ground) is partially severed. But it’ll hold until I decide what more permanent solution to go for.
Maybe I’ll buy a new keyboard, or maybe I just turn this laptop into a permanent desktop/server with a proper case to go with it.